

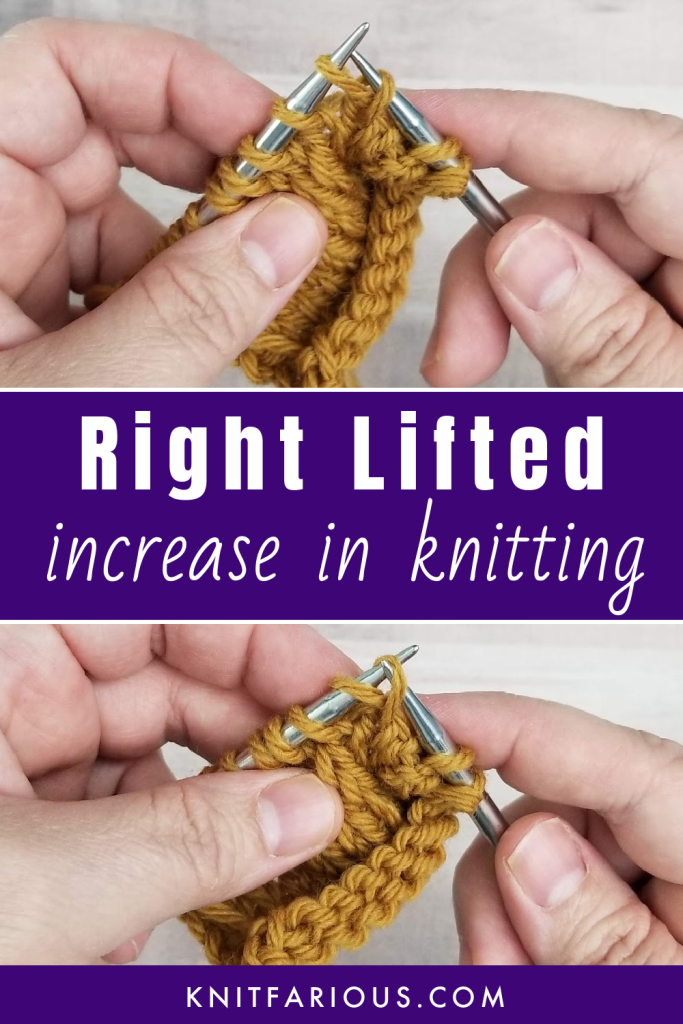
This knitting tutorial will show you how to knit lifted increases. In case you hadn’t heard, lifted increases are invisible in knitting. Well, of all the different types of increases, lifted increases are the least visible. So, it’s fair to say, each one creates an almost invisible increase.
In this knitting tutorial, I’ll teach both the right and left lifted increase. I’ll also talk a little about placing lifted increases and where they’re commonly used.
Let’s get started.
Table of Contents
- Lifted Increases in Knitting
- What You Should Know About Knitting Lifted Increases
- How to Make a Right Lifted Increase (RLI)
- How to Make a Left Lifted Increase (LLI)
- How to Undo a Lifted Increase in Your Knitting
- Where Should I Place a Lifted Increase?
- Knitting Projects to Practice Lifted Increases
- Related Posts
Lifted Increases in Knitting
There are left and right lifted increases in knitting. Each increase method requires two steps: 1) to lift the leg of the stitch below and knit it to create the increase; and 2) to knit the stitch associated with the increase. I’ll show you how to make each one later on in this post. Just know that since the lifted increase involves working with the leg of the stitch one row below, you must also knit the stitch tied to it to complete the increase.
Lifted increases produce clean lines, are easy to place, and are easy to execute. They’re also much easier to remember, in my opinion, than compared to Make 1 increases (M1, M1R, and M1L). If you don’t like the holes that Make one increases create, then lifted increases are a good substitute for them.
You can knit lifted increases on the right side of your knitting and the wrong side of your knitting, i.e., both the knit and the purl side.
What You Should Know About Knitting Lifted Increases
Lifted increases are not as commonly known or used as, say, the KFB (bar increase) or the M1R/M1L (make one right/left). I’m not sure why, especially since they create such lovely invisible increases in stockinette stitch fabric.
They’re not always called lifted increases in some regions and texts. I found that the book, The Principles of Knitting, calls these “Raised Increases.” If you don’t have this book, I highly recommend it!
I’ve also seen the pattern instructions written and abbreviated these ways:
- Knit Left Loop (KLL) and Knit Right Loop (KRL)
- Lifted Increase After (LIA) and Lifted Increase Before (LIB)
Surprisingly, the Craft Yarn Council (CYC) doesn’t list a standardized knitting abbreviation for lifted increases. However, I find that the RLI and LLI knitting abbreviations seem the easiest to remember, at least for me anyway.
To make a lifted increase in your knitting, you’ll need to be able to identify your stitches, particularly the legs of your stitches, and where the increases occur. However, this sounds harder than it is, I promise.
Let’s start with the right lifted increase.
How to Make a Right Lifted Increase (RLI)
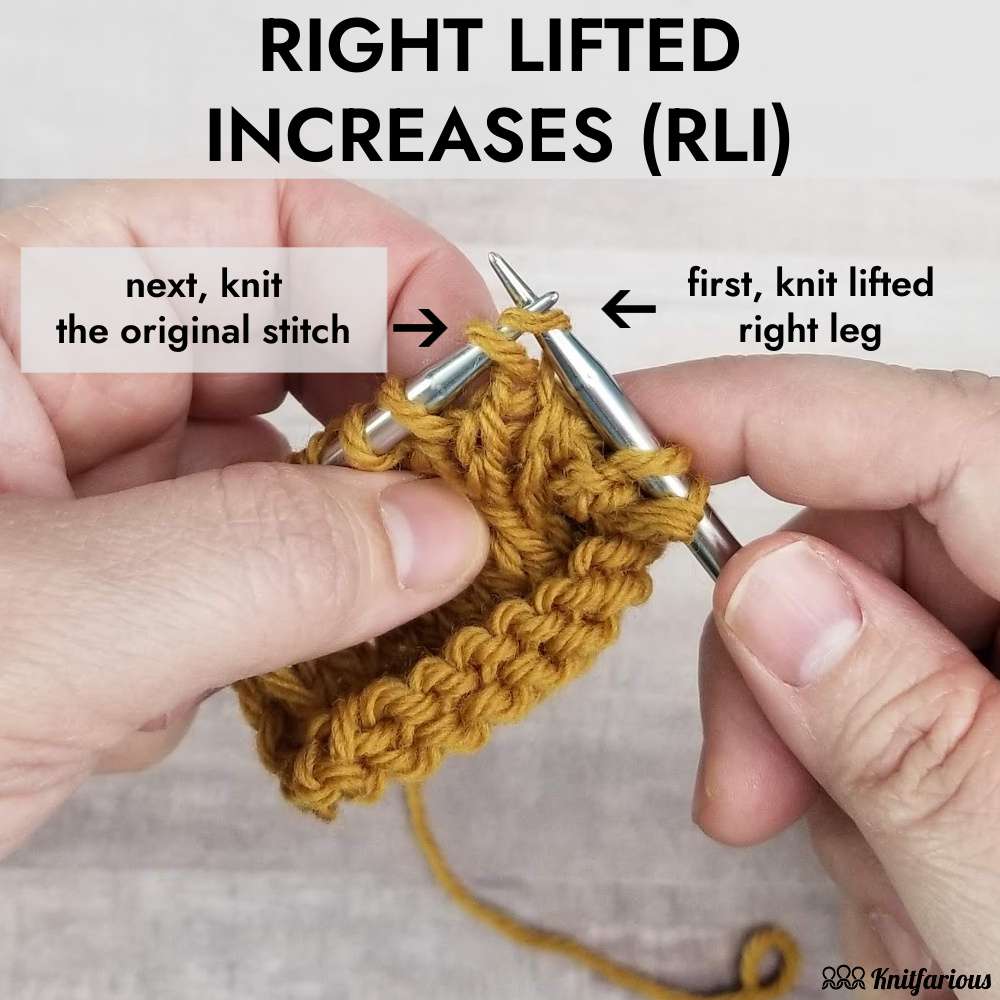
The right lifted increase, abbreviated as RLI, is the easiest to work and produces a right slanting (right-leaning) increase.
This increase occurs on the right side of the stitch and uses the right leg of the stitch below. To make the RLI, identify where you want to place the lifted increase and knit to that point.
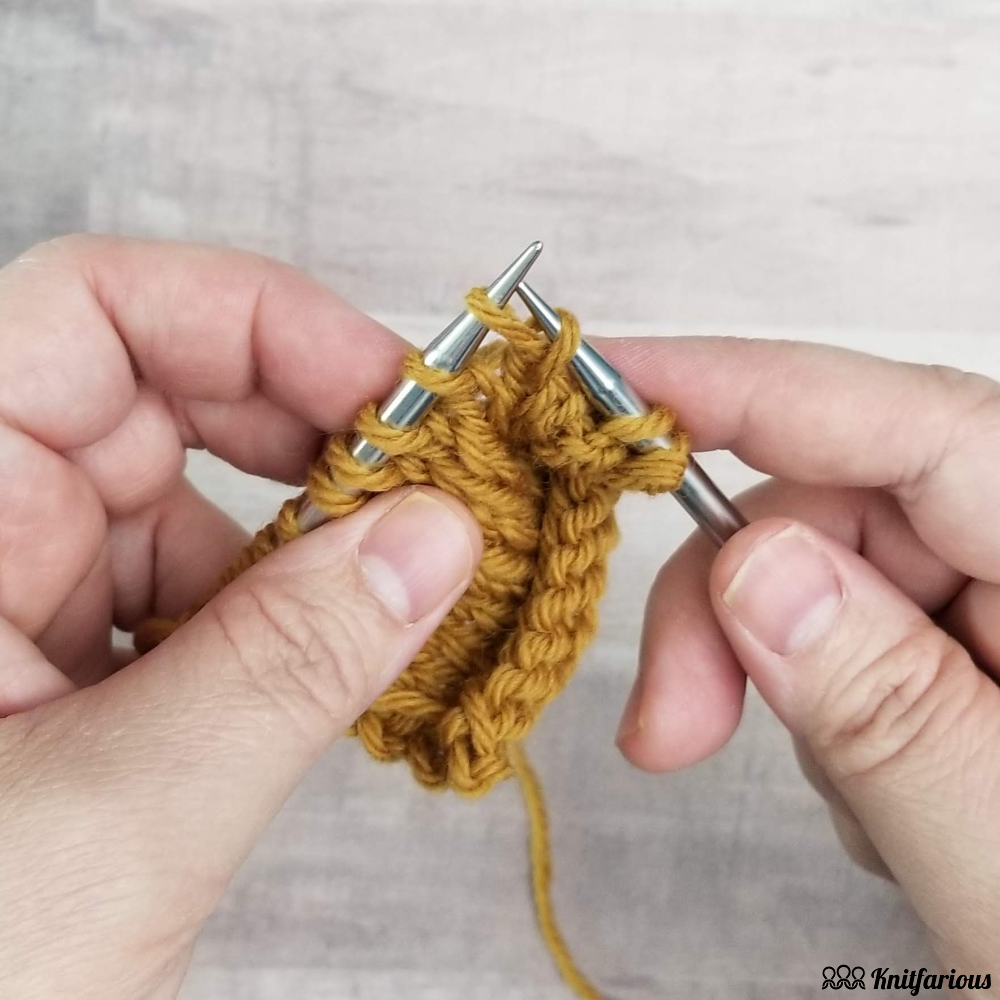
Insert your right needle tip into the right leg of the knit stitch as shown in the image above.
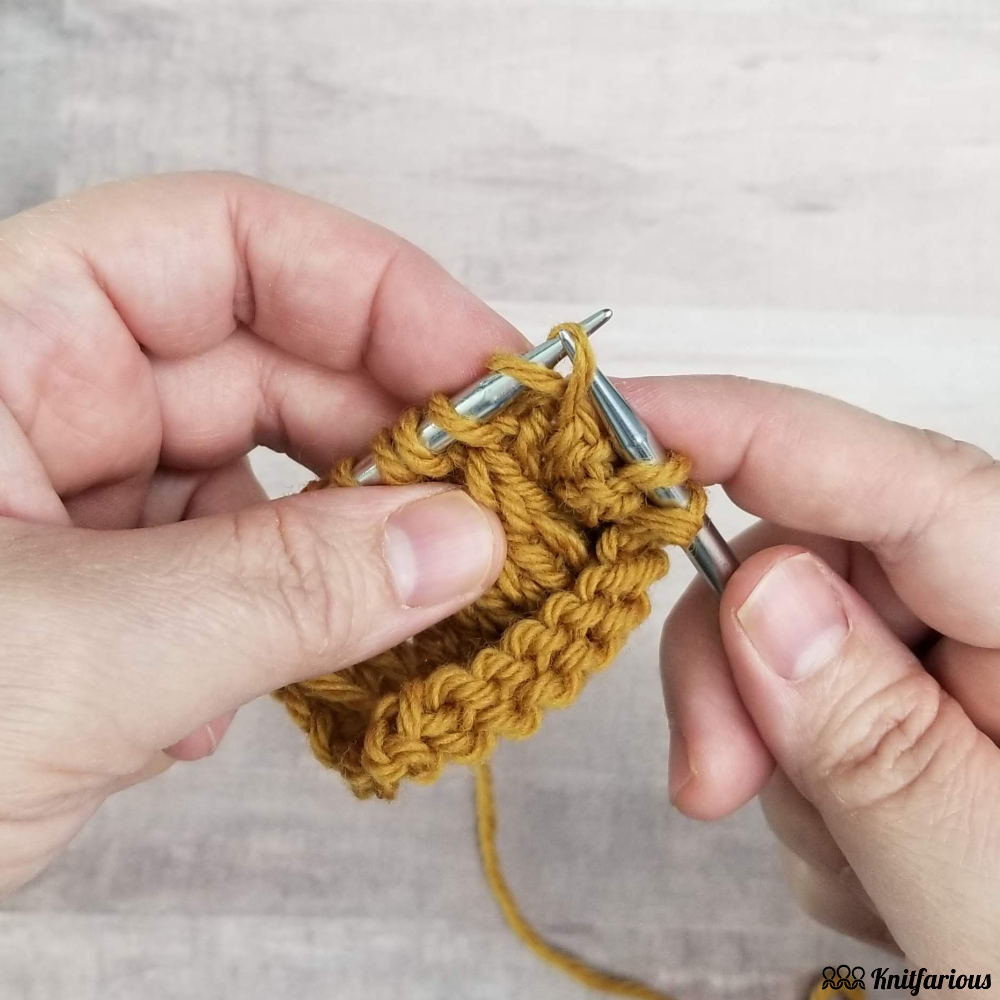
Lift the right leg of the stitch below up onto the left needle without twisting the stitch. Now, knit this stitch normally. Next, knit the original stitch to complete the increase.
TIP: If your project asks you to place an increase at the beginning and end of a row, AND it requires seaming, knit a few stitches before and after the edge before working placing the RLI and LLI. This will make finishing your edges easier.
How to Make a Left Lifted Increase (LLI)
The left slanting lifted increase is a little bit tricky but it’s easy enough to master. Unlike the RLI, the left lifted increase occurs on the left side of the stitch using the left leg from two stitches below.
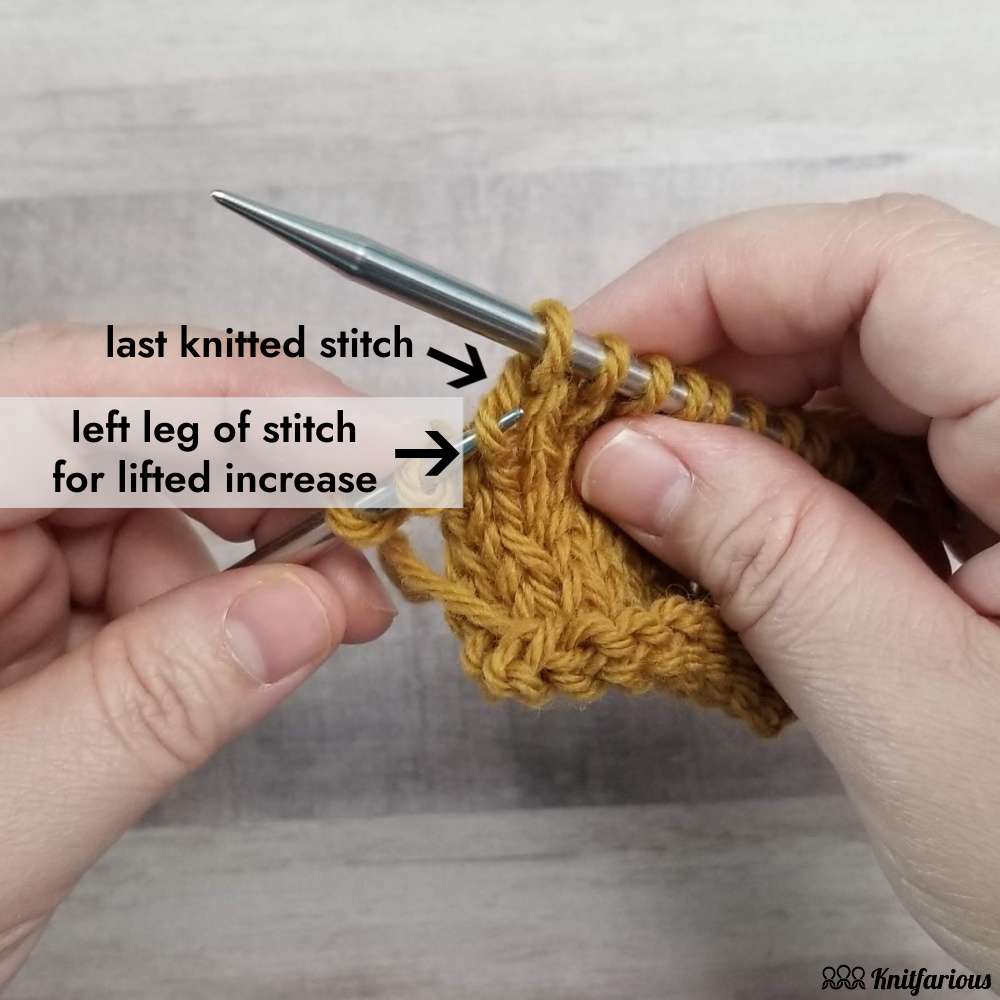
To make the LLI, identify the location of where the increase will sit. First, knit this stitch normally. Then locate the left leg of the stitch below the one you just worked. You want to knit the left leg of the stitch below this one, as shown in the image above.
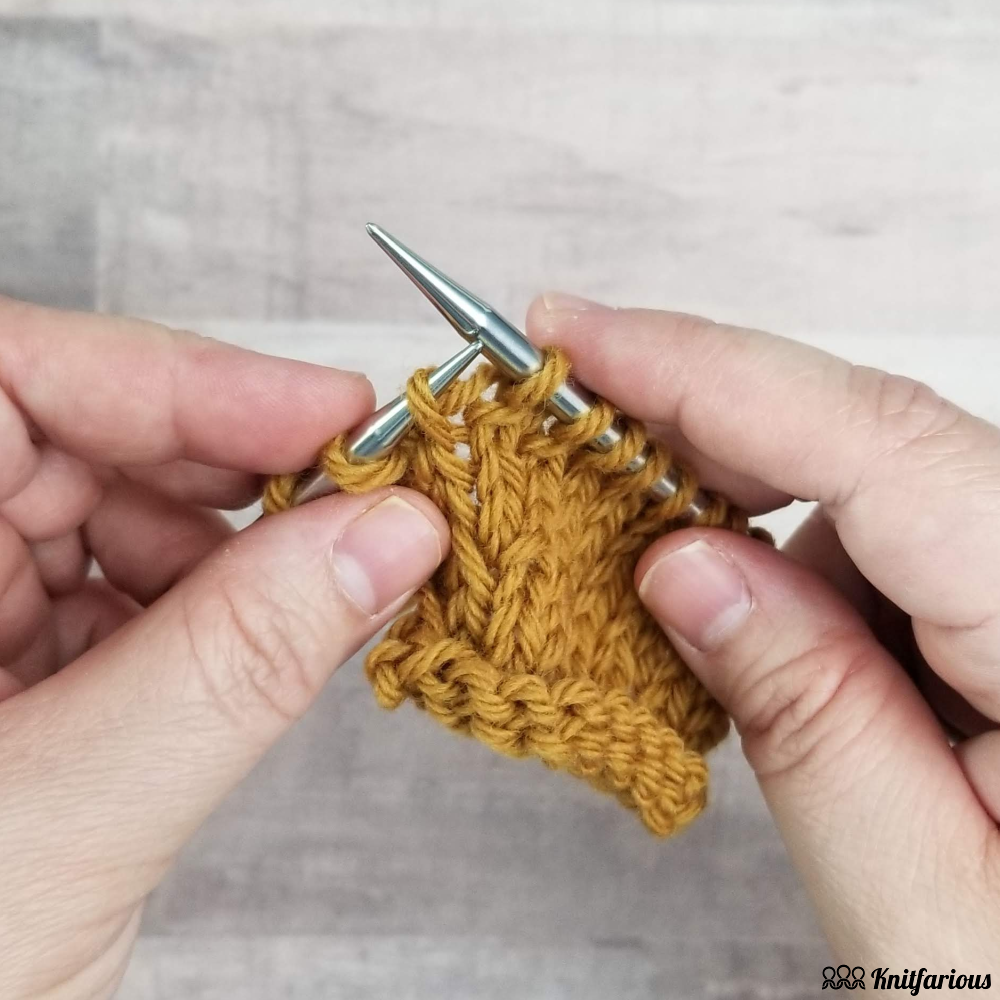
First, insert your left needle into the left leg of the stitch below and lift it up onto the left needle tip, shown above.

Then, knit the stitch through the back loop, as shown above. Make sure that you knit the stitch through the back loop, otherwise your increase stitch will be twisted.
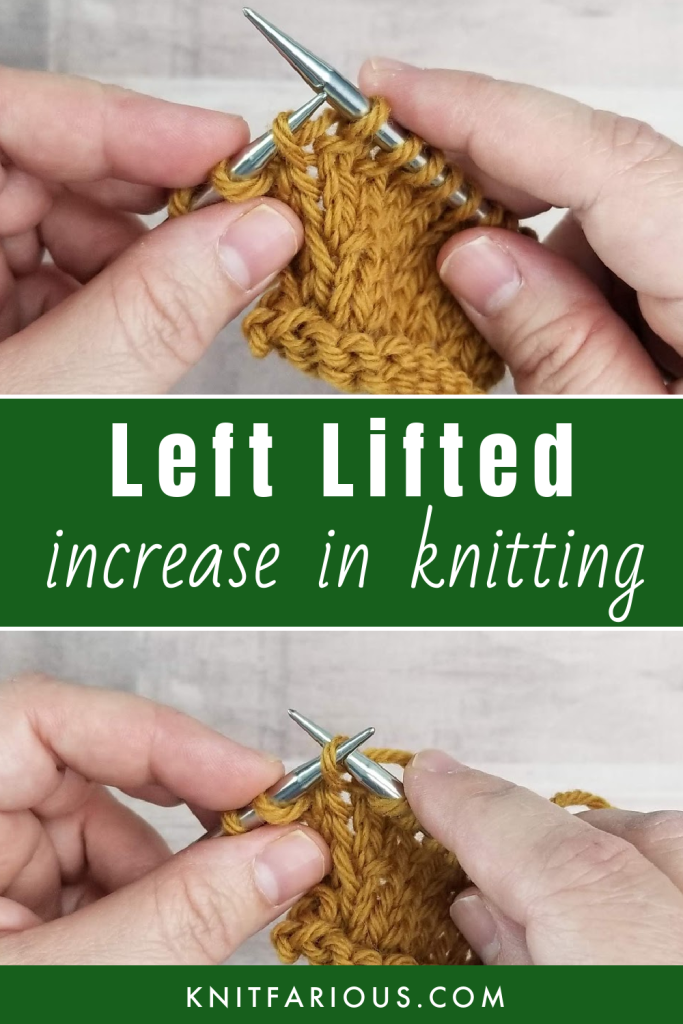
Finally, when you’re learning how to knit lifted increases, you should also know how to unknit these increases. Let me teach you how.
How to Undo a Lifted Increase in Your Knitting
If you need to undo your knitting, or tink back, here’s how you undo each lifted increase.
First things first, turn your knitting so the back of the work is facing you.
To undo a left lifted increase, remember that the increase will come first as you work back. Simply drop the lifted increase off the needle. Then, unknit the stitch that it was connected with.
To undo a right lifted increase in your knitting, you’ll have to unknit the stitch it’s connected with first, since the increase comes after on the right side of your knitting. Then drop the lifted increase off of your knitting needle.
Now, let’s talk about placing lifted increases in your knitting.
Where Should I Place a Lifted Increase?
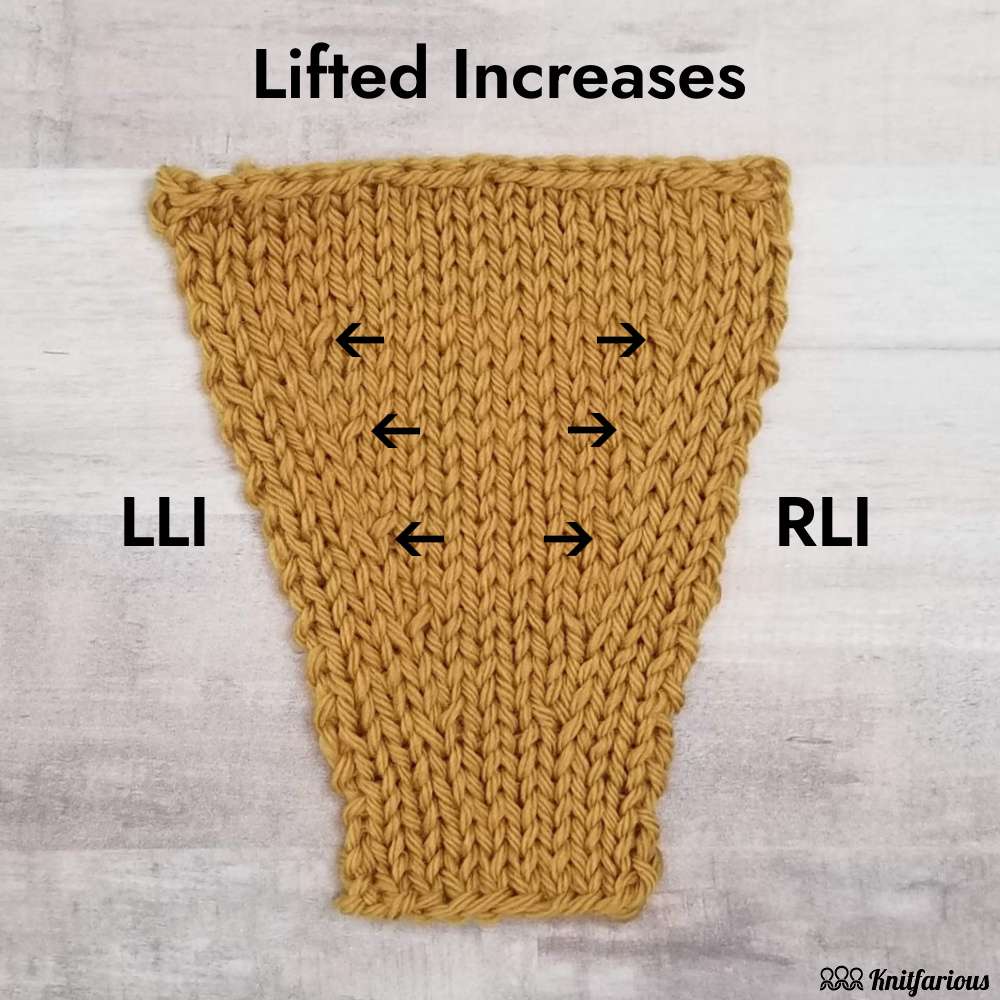
It’s easy to remember where to place the right lifted increase compared to the left because it occurs on the right side of the stitch. Since the left lifted increase occurs after the knitted stitch, more consideration is needed on where to place it, especially if you’re mirroring and blending the increases.
With lifted increases, you’re using the strands of yarn from the stitch in the row below. For this reason, it’s better to put some space between your increase rows rather than stack them up.
If you work lifted increases on every row, you’ll quickly realize that you’re increasing into the same stitch, which can cause fabric distortion.

Some examples of where you’d use lifted increases include:
- Knitting a cuff up sleeve.
- Top down sweater necklines.
- Raglan shaping, like in the cardigan pattern below.
- Triangle shawl shaping, like in the cable knit shawl below.
- Bias knit shawls, like in the Aedeline Shawl (shown above).
Love this shawl and yarn? Get them both here:
TIP: When making a lifted increase, just be sure to give the increase stitch enough slack in order for it to lay properly. Too tight and your increase will produce a hole.
Knitting Projects to Practice Lifted Increases
Need some knitting inspiration to practice knitting lifted increases? I got you covered. Here are a couple of knitting projects to practice the lifted increase technique.
Winter Lobster Shawl
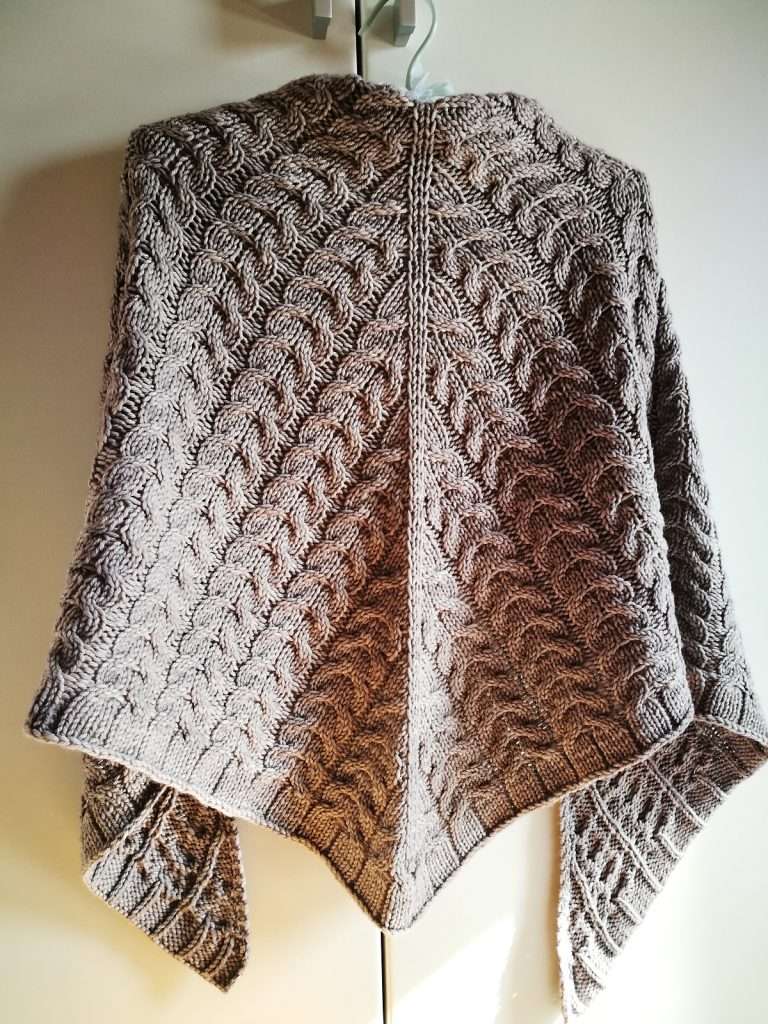
Love the look of cable knitting? Here’s a worsted yarn weight cable knit wool shawl that’s rich in texture. Neutral colors really make this cable shawl really stand out. Plus, you can practice RLI, LLI, and KFB knitting increases, as well as working with a cable needle.
Get this free shawl pattern and yarn for this project here:
Try Malabrigo Rios yarn or Drops Alaska yarn for this knitting project.
You can find more free shawl patterns here.
Bly Cardigan

This open front cardigan knits up in worsted weight cotton yarn and features raglan shaping and a split hem. But you could also knit double stranded and make your own marled yarn in your favorite yarn fiber.
The original yarn recommendation, Berroco Indigo, is now a discontinued yarn but I’ve included some yarn substitutions below.
Get this free cardigan pattern and yarn for this project here:
Try Patons Classic Wool Worsted yarn or Berroco Vintage yarn for this knitting project.
I hope you enjoyed reading this blog post and learning about lifted knitting increases. If you have any questions or just want to leave a comment, please do so below. I’d love to hear from you.
P.S. A video tutorial for the lifted increase is coming soon. Stay tuned!


