

Today I’ll teach you how to knit through the back loop. It’s a super simple knitting technique that requires only one step, but can drastically change the look of your knitted fabric.
I’ll begin by explaining what knitting through the back loop is, what it does, and then show you how to do it with a step-by-step guide. I’ll even discuss some frequently asked questions.
Let’s get right into it!
Table of Contents
- What is Knitting Through the Back Loop?
- What Does Knitting Through the Back Loop Do?
- What Does Knit Through the Back Loop Look Like?
- How to Knit Through the Back Loop (KTBL)
- How to Undo a Stitch Knit Through the Back Loop
- FAQs About Knitting Through the Back Loop
- Practice Knitting Through the Back Loop
- Related Posts
What is Knitting Through the Back Loop?
First things first, knitting through the back loop is just a different way to knit a stitch.This particular knitting technique is not a knitting decrease as it only affects one stitch. However, the technique can be used in some knitting decreases, but I’ll get to that a little later on.
For now, let’s focus on what knitting through the back loop is and what it does to your stitches.
What Does Knitting Through the Back Loop Do?
This knitting technique creates a twisted stitch in your knitting. Sometimes this is intended for design purposes, like twisted ribbing or twisted stockinette (both shown below).
Twisted stitches, though an interesting design style, will produce a knit fabric that’s tighter than traditional stockinette or knit ribbing, etc.. Using this technique can and will affect the finished size because of the nature of the stitch.

In the above swatch, you can see the bottom half is 2×2 rib stitches, while the upper half is twisted ribbing. The ribbed portion of the swatch is known as Half Twisted Rib as you are only twisting the knit stitches, but not the purl stitches, by knitting through the back loop. In other words, you’re only twisting half the stitches.
What Does Knit Through the Back Loop Look Like?
Here’s another example of what knitting through the back loop looks like. In the stockinette stitch swatch shown below, the right half is regular stockinette, while the left hand side shows stitches knit through the back loop.
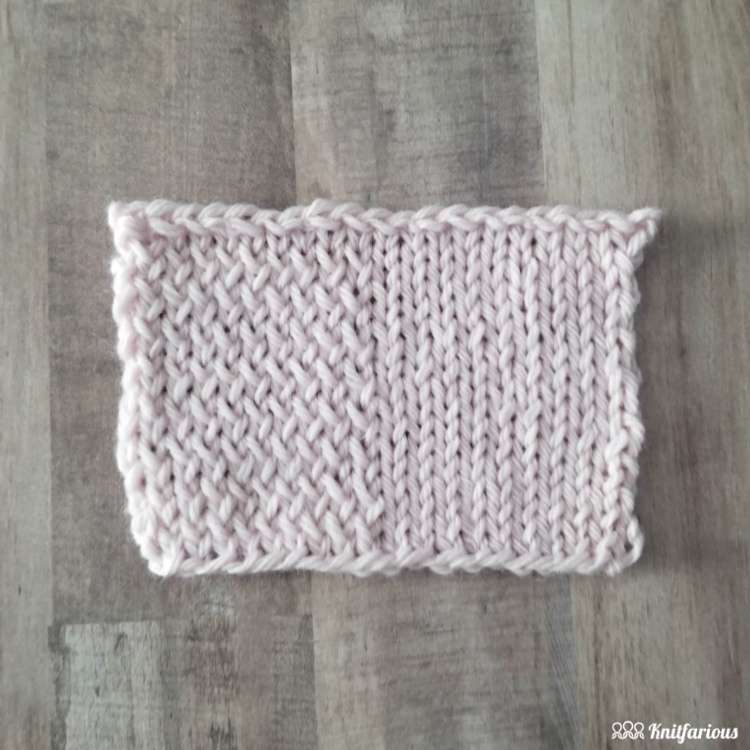
This look was achieved by long tail casting on 20 stitches on size 9 (5.50 mm) needles using worsted weight superwash wool yarn. On the right side, I knit the first 10 stitches normally, while the last 10 stitches I knit through the back loop. On the back side or wrong side, I purled across all stitches. The end result creates a braided look to it where the twisted stitches overlap each other.
It may not be easily seen here but the twisted stitches on the left hand side create a slightly narrower fabric than the right hand side. This is because twisting each stitch creates a tighter stitch, which also results in creating a knit fabric that’s tighter and has more stability than traditional stockinette or knit ribbing, etc..
Since this technique can affect the finished size because of the nature of the stitch, be sure to knit a gauge swatch for the project you want to knit.
Now, let me show you how to work this knitting technique with an easy photo tutorial. Video coming soon!
How to Knit Through the Back Loop (KTBL)
When you knit through the back loop, you’ll need to position your knitting needle differently. Instead of knitting through the front loop, you’ll knit through the back loop of a stitch, just as the name suggests.
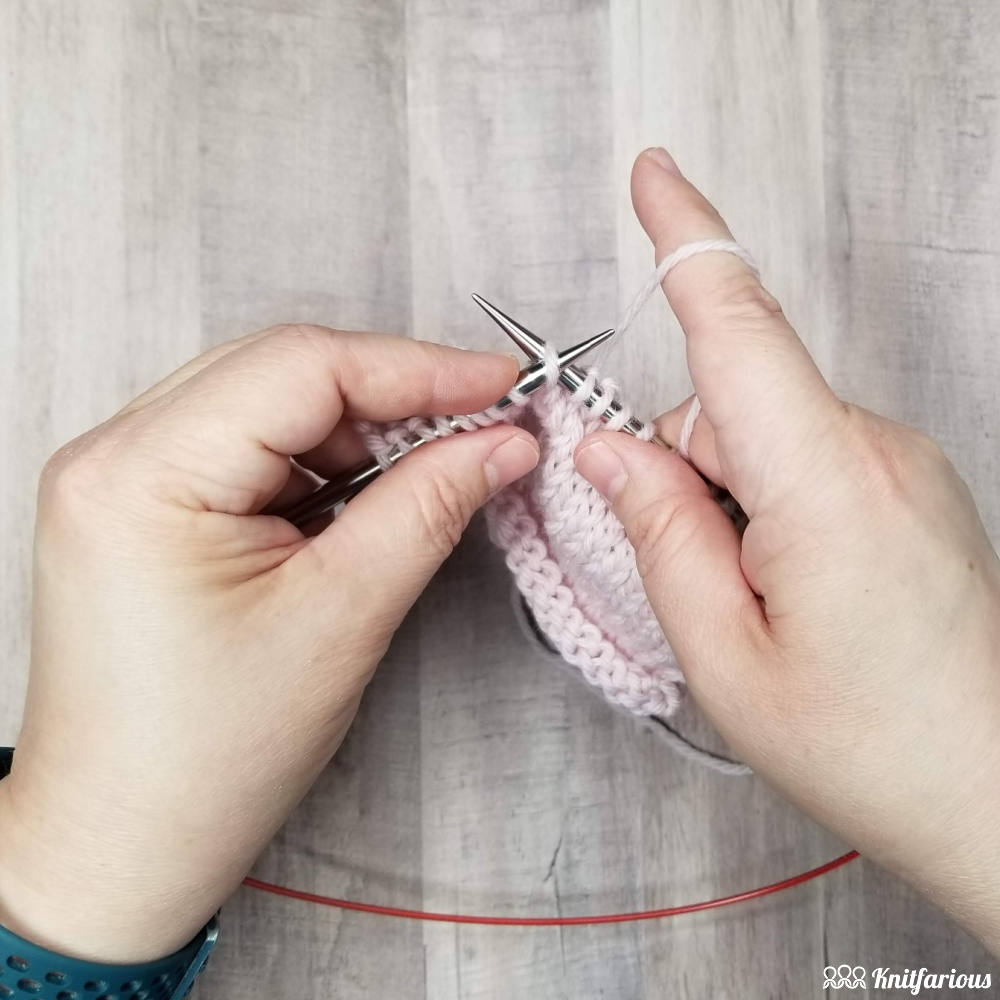
To do this, first insert the tip of your right needle through the back of the stitch from right to left. With your working yarn in back, wrap your yarn around the needle as you normally would for a normal knit stitch. For English style knitting, as shown here, wrap the yarn counterclockwise around the right needle and pull the stitch through.
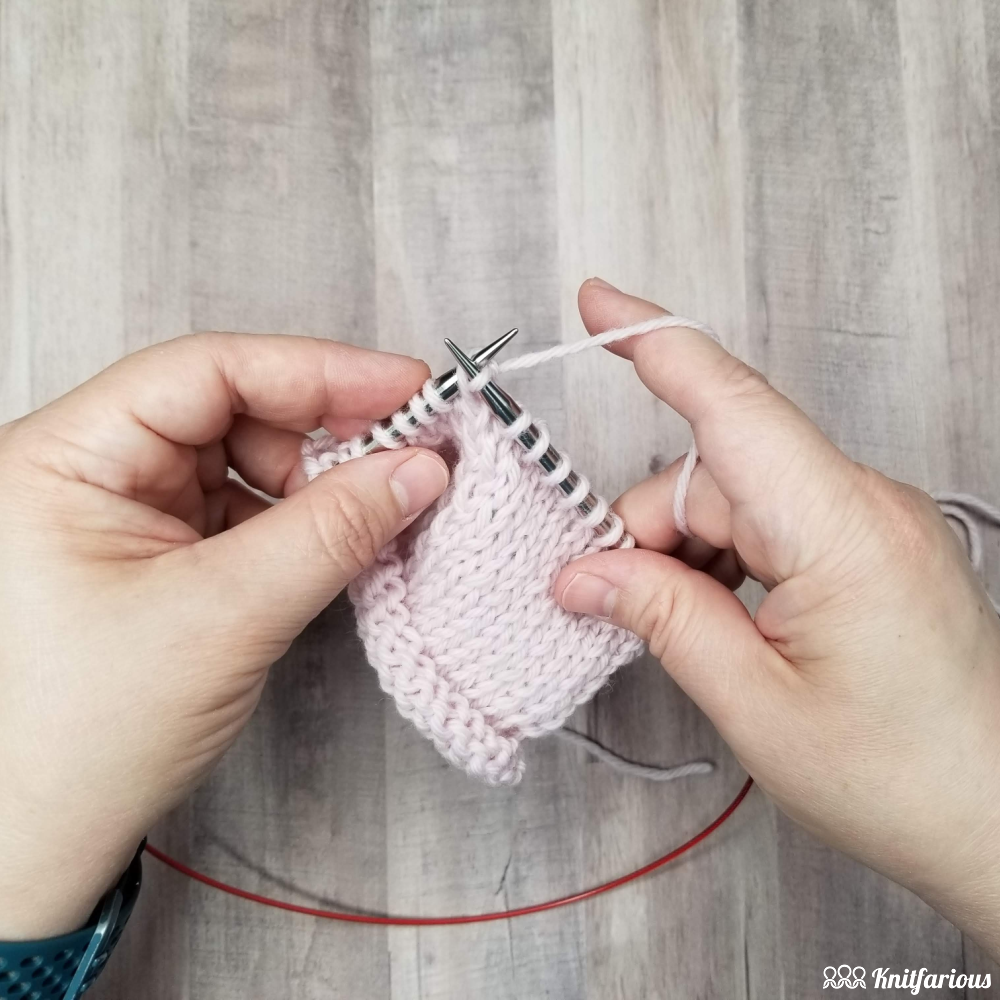
That’s how easy it is to knit through the back loop. And now that you’ve learned how to do it, let me show you how to undo or unknit this stitch.
How to Undo a Stitch Knit Through the Back Loop
To unknit or to tink a stitch knitted through the back loop, you’ll need to reverse the steps. Since you knit through the back loop to work the stitch, you’ll need to work the opposite side to undo it. Here’s how to undo this stitch.
Turn your work so the wrong side (WS) of the knitting is facing you. On the purl side of the stockinette swatch, insert your right needle through the stitch from front to back, as shown below.
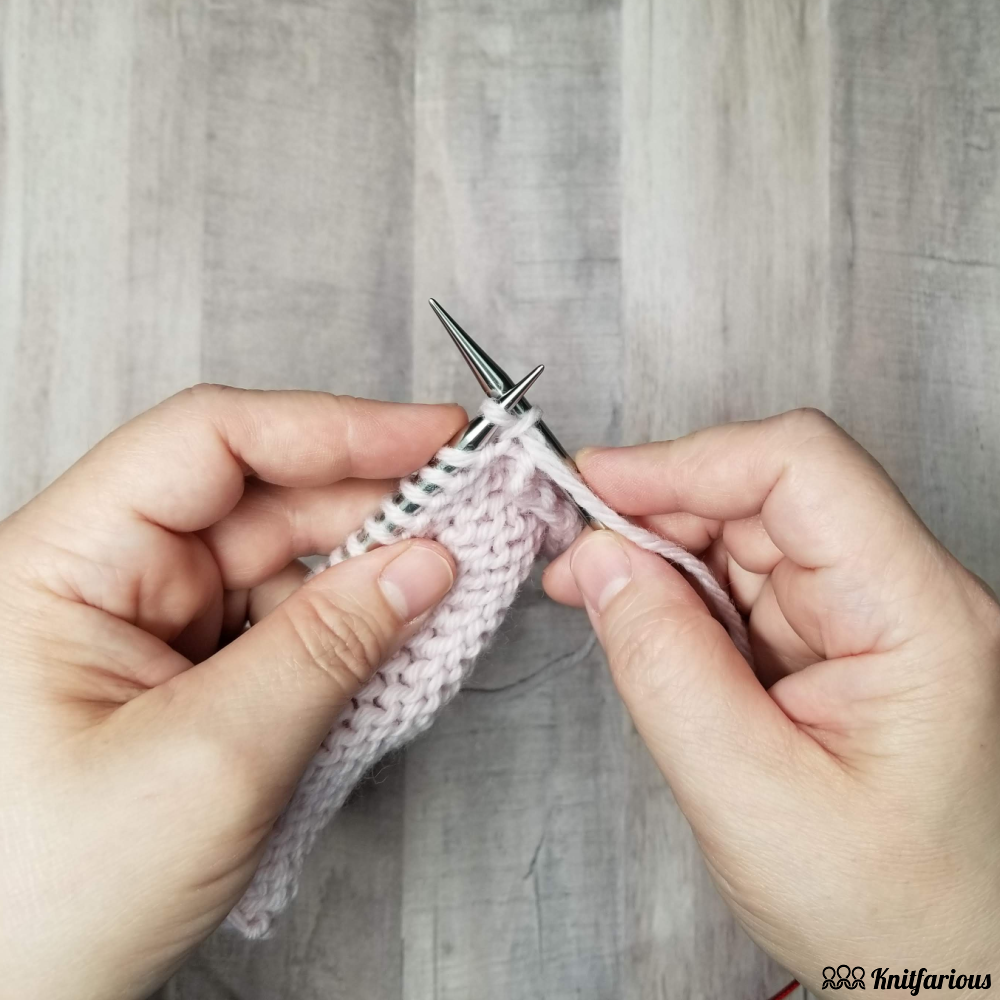
After you insert your needle through the stitch, remove the stitch from your left needle onto your right needle and pull the stitch free to undo the KTBL. This will bring you back to your original stitch.
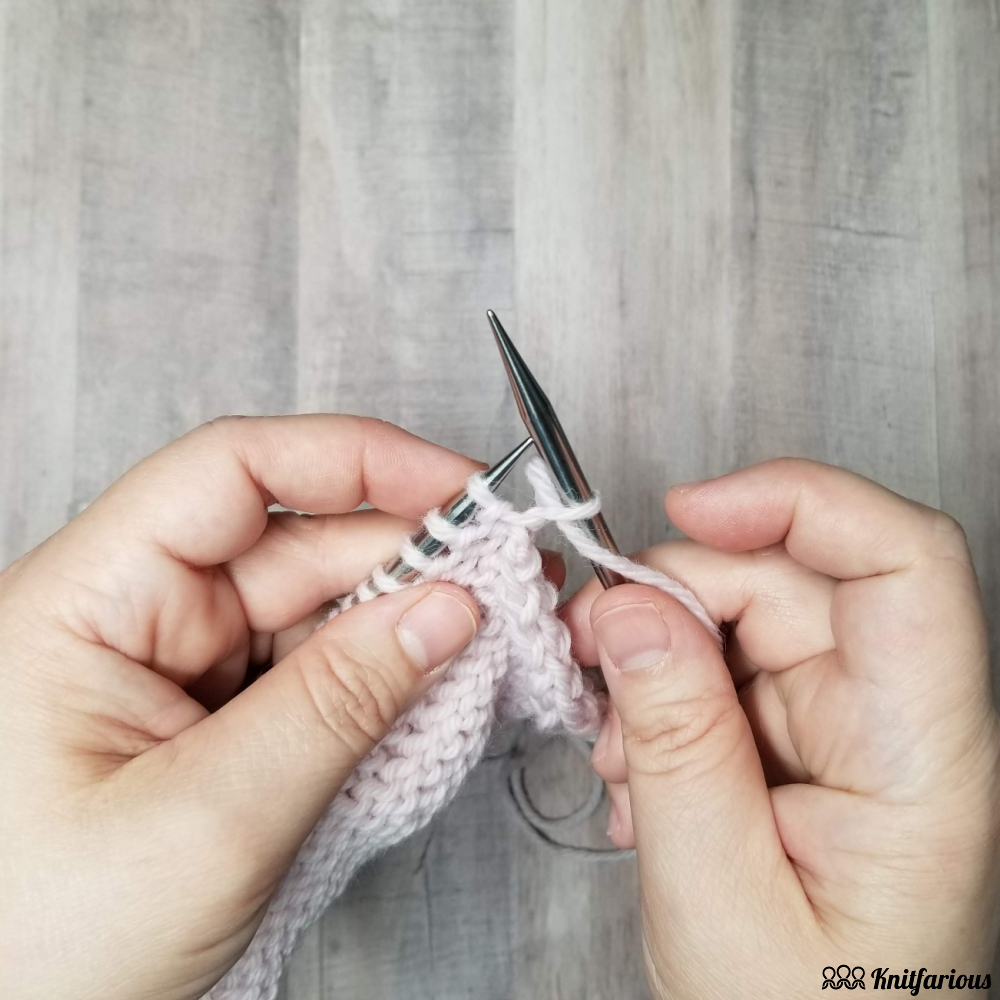
That’s it! That’s how you undo a stitch knit through the back loop.
Now let’s get into some frequently asked questions related to knitting through the back loop.
FAQs About Knitting Through the Back Loop
Here are some of the most frequently asked questions about knitting through the back loop.
How is Knit Through the Back Loop Abbreviated in Knitting Patterns?
You will find the knitting abbreviation for knit through the back loop written a couple different ways. The abbreviation to knit is “K” and through the back loop is “TBL” so this instruction is often written with a space between them, like this: K TBL. However, it is also frequently written or abbreviated without a space, like this: KTBL.
You will also see pattern instructions telling you how many stitches to knit through the back loop. For example, the 2×2 ribbed swatch I showed earlier in this post is written like this: K2TBL, P2.
Is K2TOG TBL the same as K2TBL?
No, these knitting instructions do not mean the same thing. The first abbreviation is a knitting decrease, while the second abbreviation relates to individual twisted knit stitches.
When a knitting pattern says K2TOG TBL, this means to knit two stitches together at the same time through the back loop, which decreases a single stitch. If a knitting pattern says to K2TBL, this means to knit two stitches, one at a time, through the back loops. These are also different from knitting two together (K2TOG).
You can find a tutorial to K2TOG TBL here and the K2TOG tutorial here.
Why Would You Knit Through the Back Loop?
There’s a couple of reasons why you’d want to knit through the back loop. They include:
- Decorative purposes.
- Closing a yarn over hole.
- Reorient unintentionally twisted stitches.
- Reorient stitches like in the slip, slip, knit (SSK).
- Closing holes created from picking up stitches (ex. sock gussets).
Practice Knitting Through the Back Loop
Now that you’ve learned how a simple twisted knit stitch can create touchable textures in your knitting, it’s now time to try it for yourself. I’m including two free knitting patterns below. I hope you enjoy these fun patterns and find a little knitting inspiration on the way.
Bosquet Hat
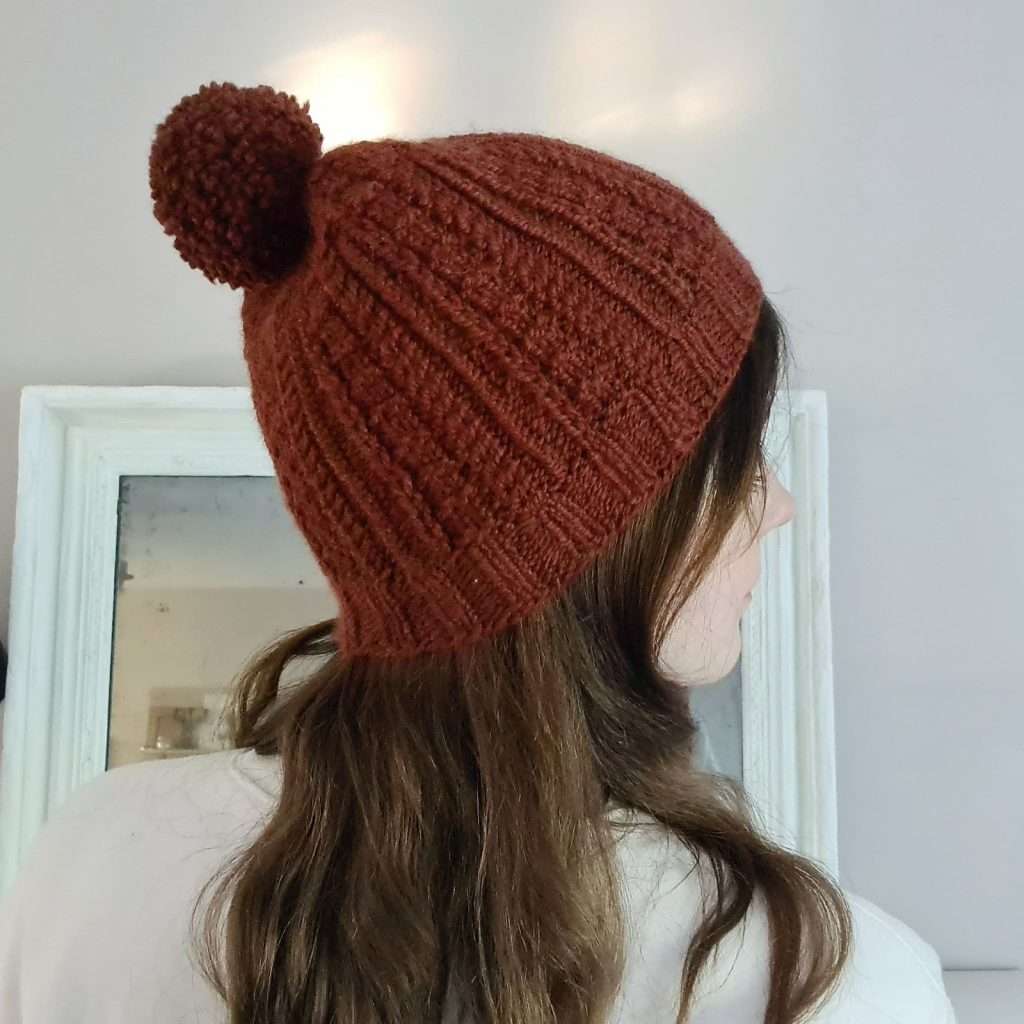
Here’s a fun knitted hat pattern that features KTBL stitches and small cables. Using 100% wool in aran weight yarn and 4 mm needles (U.S.size 6), you’ll love how the textured stitches create such a nice visual effect.
Love this pattern? There’s a matching mittens pattern, too! Get the Bosquet Mittens pattern here.
Get this free hat pattern and yarn for this project here:
Try Drops Lima or Drops Nepal yarn as yarn substitutes for this knitting project.
Want more free hat patterns? Check out our blog post full of free hat knitting patterns.
Siki Shawl
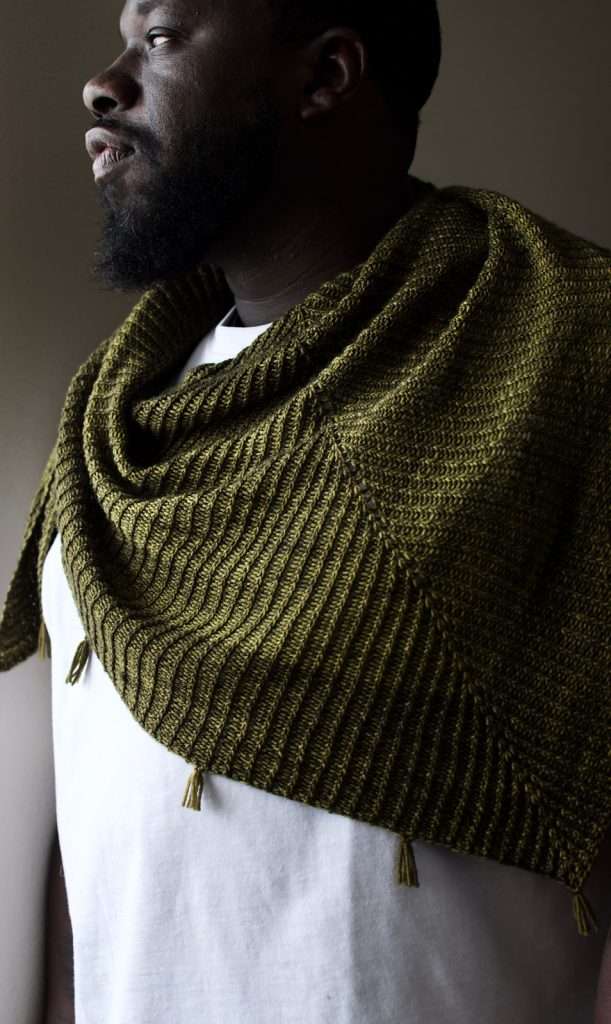
If you love triangle knit shawls, you’ll love knitting this with just 2 yarn hanks of your favorite super fine weight yarn. It features half twisted ribbing and traditional ribbing along with knitting increases and decreases (like the P2TOG). Customize it with tassels or fringe!
Get this free shawl pattern and yarn here:
Try Malabrigo Yarn Ultimate Sock, Knit Picks Hawthorne Hand Painted Sock, or Wayback Yarns Truly Twisted SW yarn for this knitting project.
Love shawl patterns? Check out these free shawl patterns here.
I really hope you enjoyed this blog post on how to knit through the back loop and now feel confident to try this new trick in your knitting.
Don’t forget to subscribe to our newsletter to get updates on new patterns, new posts, shop updates, hand dyed yarn, and so much more.


