

Today’s blog will teach you how to purl through the back loop. This simple knitting technique requires only one step and creates twisted purl stitches in your knitting.
I’ll begin by explaining what purling through the back loop is, what it does, and then show you how to do it with a step-by-step guide. I’ll even answer some frequently asked questions about purling through the back loop.
Let’s get right into it!
Table of Contents
What is Purling Through the Back Loop ( PTBL)?
First things first, purling through the back loop is just a different way to purl a stitch, which results in a twisted purl stitch.This particular knitting technique is not a knitting decrease as it only affects one stitch. I’ll discuss knit and purl decreases that use this technique a little later on.

For now, let’s focus on what purling through the back loop is and what it does to your stitches..
What Does Purling Through the Back Loop Do?
As I discussed in my previous blog post on knitting through the back loop (KTBL), any time you work a stitch through the back loop, you’re twisting the orientation of the stitchThis is intentionally done to create a different effect. I’ll discuss other reasons a little later on in this post.
The important thing to take note of is that when using twisted stitches in your knitting, the gauge and tension is affected. Twisting stitches also creates a tighter, denser fabric and, in some cases, provides more stability. It all depends on what you’re looking for in your knitting.
As with all cases, be sure to knit a gauge swatch before you begin a project that requires purling through the back loop or other twisted stitches.
What Does Purl Through the Back Loop Look Like?
Here’s one example of what purling through the back loop looks like. In the stockinette stitch swatch shown below, the right side shows twisted stitches purled through the back loop (ptbl), while the left side shows regular stockinette stitches.
I created this swatch by long tail casting on 20 stitches on size 9 (5.50 mm) needles using medium worsted weight superwash wool yarn.
On the wrong side (WS), or purl side of my knitting, I purled the first 10 stitches. Then I purled through the back loop the last 10 stitches. Then, on the right side (RS), I knit the stitches normally. Once I was satisfied with the length, I cast off (bind off) all 20 stitches.
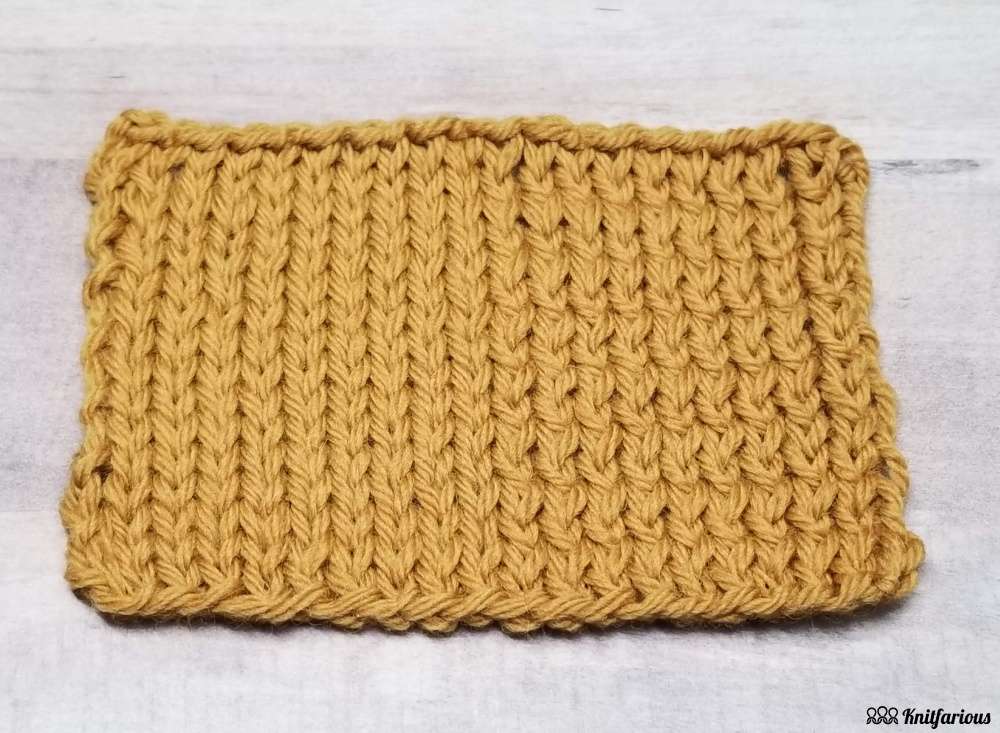
Notice how the twisted stitches disrupt the smoothness of the knit fabric and overlap each other in a braided effect. This knitting technique, whether knitting through the back loop (k tbl) or purling through the back loop (p tbl), creates a textured look to the stitches and adds a distinct touch to your finished knits.
Now, let me show you an easy photo tutorial of how to purl through the back loop. Video coming soon!
How to Purl Through the Back Loop (PTBL)
Purling through the back loop doesn’t always happen on the wrong side of your knitting, but for the purpose of this knitting tutorial, I’ll demonstrate it this way.
Remember, in regular purling, you insert your knitting needle tip through the front of the stitch and wrap your yarn counterclockwise. To purl through the back loop, you still wrap your yarn the same way. However, since you need to twist the stitch, you’ll have to enter the stitch differently.
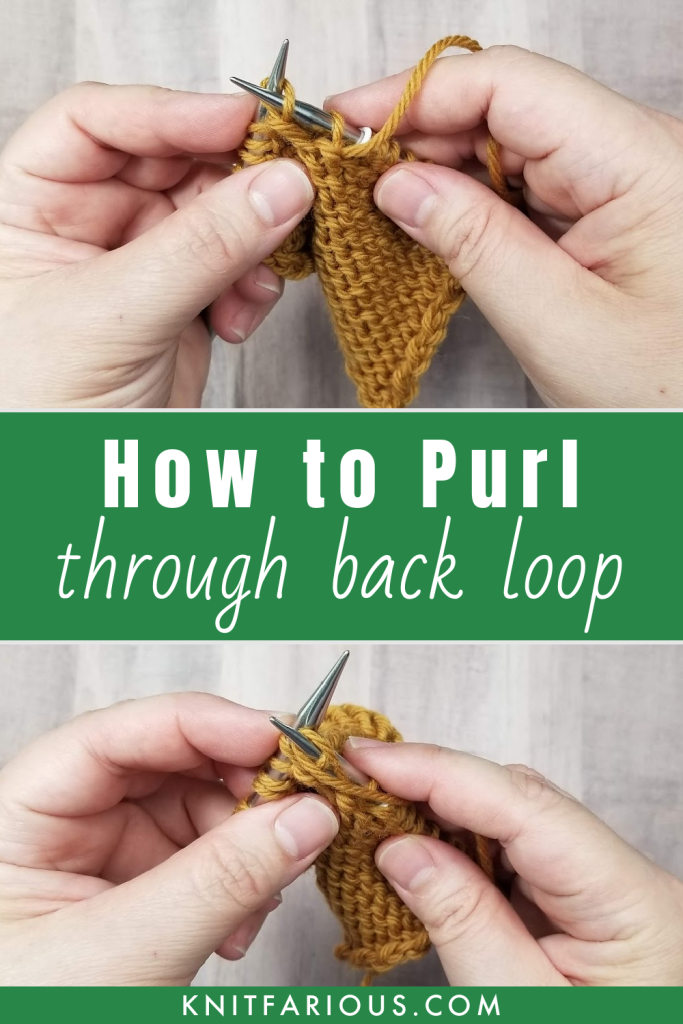
Take a look at this first image below. Notice how the knitting needle comes through the stitch from back to front.
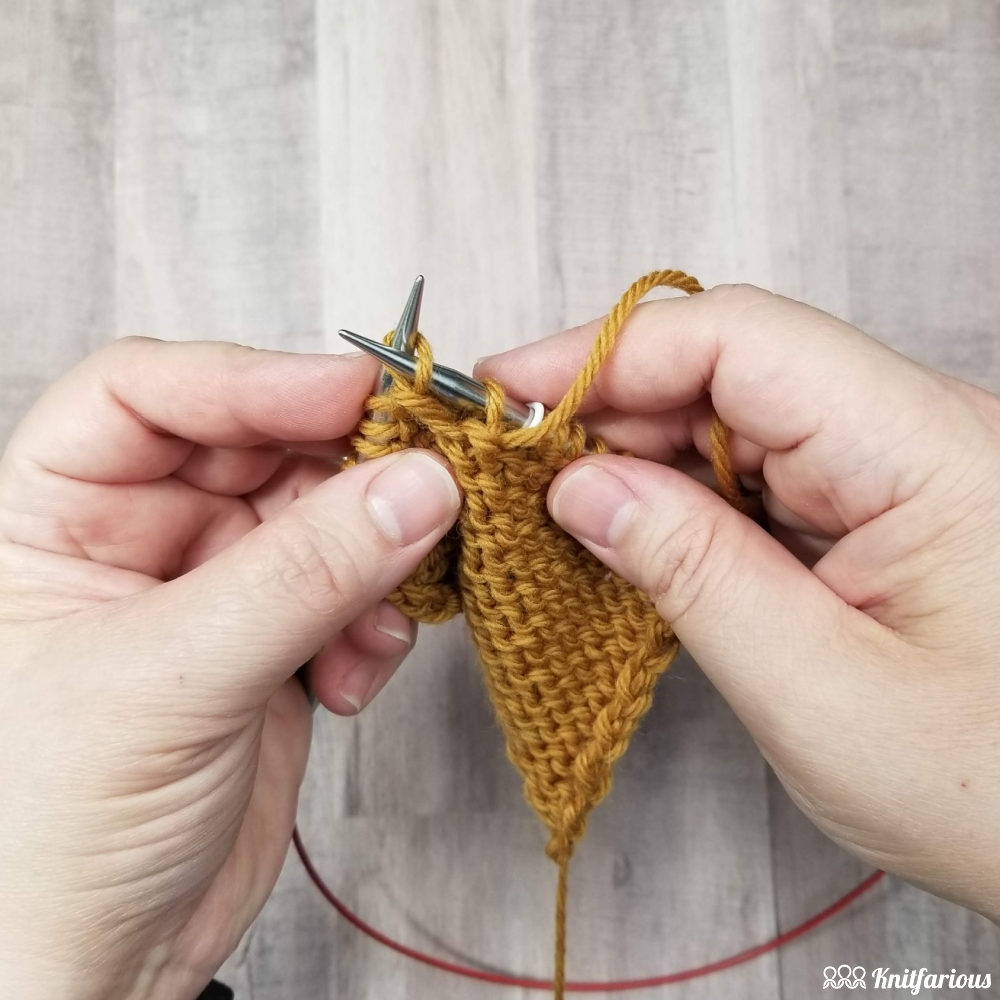
To purl through the back loop, first make sure that your working yarn is in front as if to purl. Next, insert your right hand needle into the stitch from behind. You can see a subtle twist beginning to occur in the stitch.
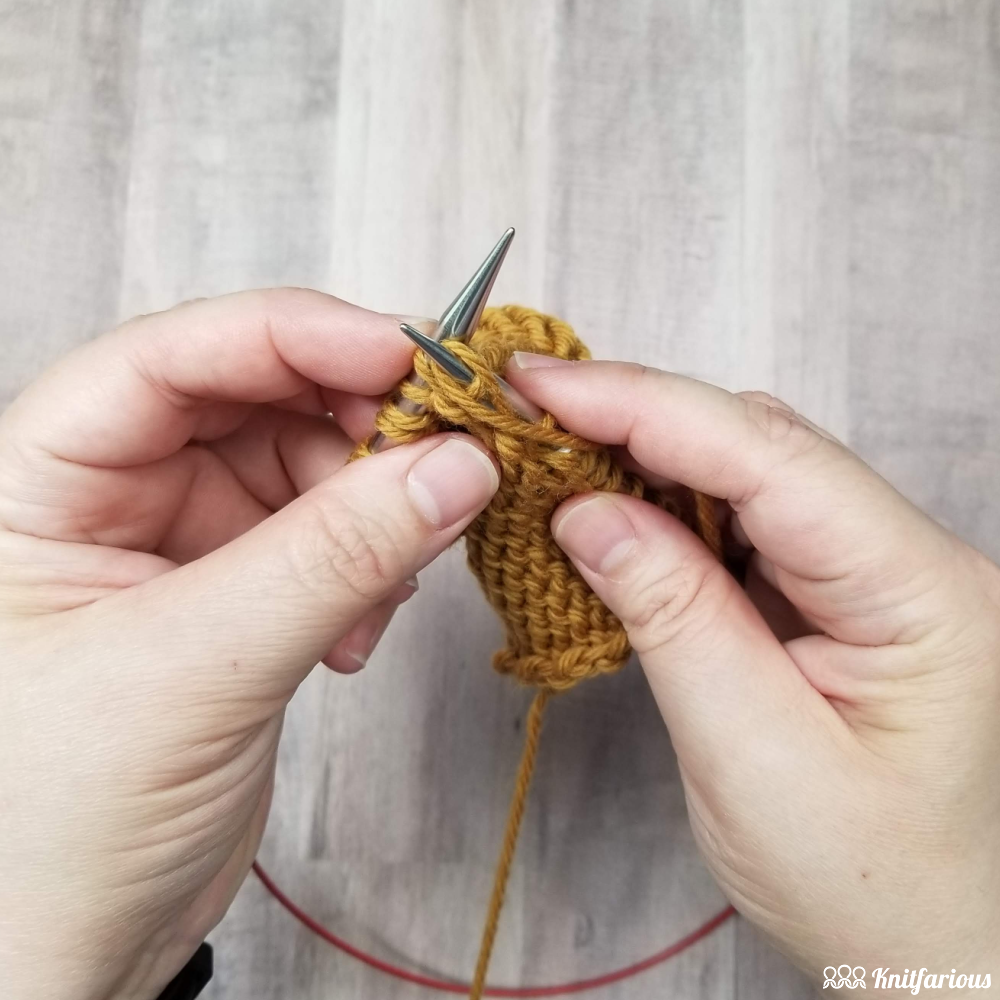
Next, wrap your yarn around the stitch counterclockwise as you would a regular purl stitch. Then, pull the loop of yarn through to complete the stitch.
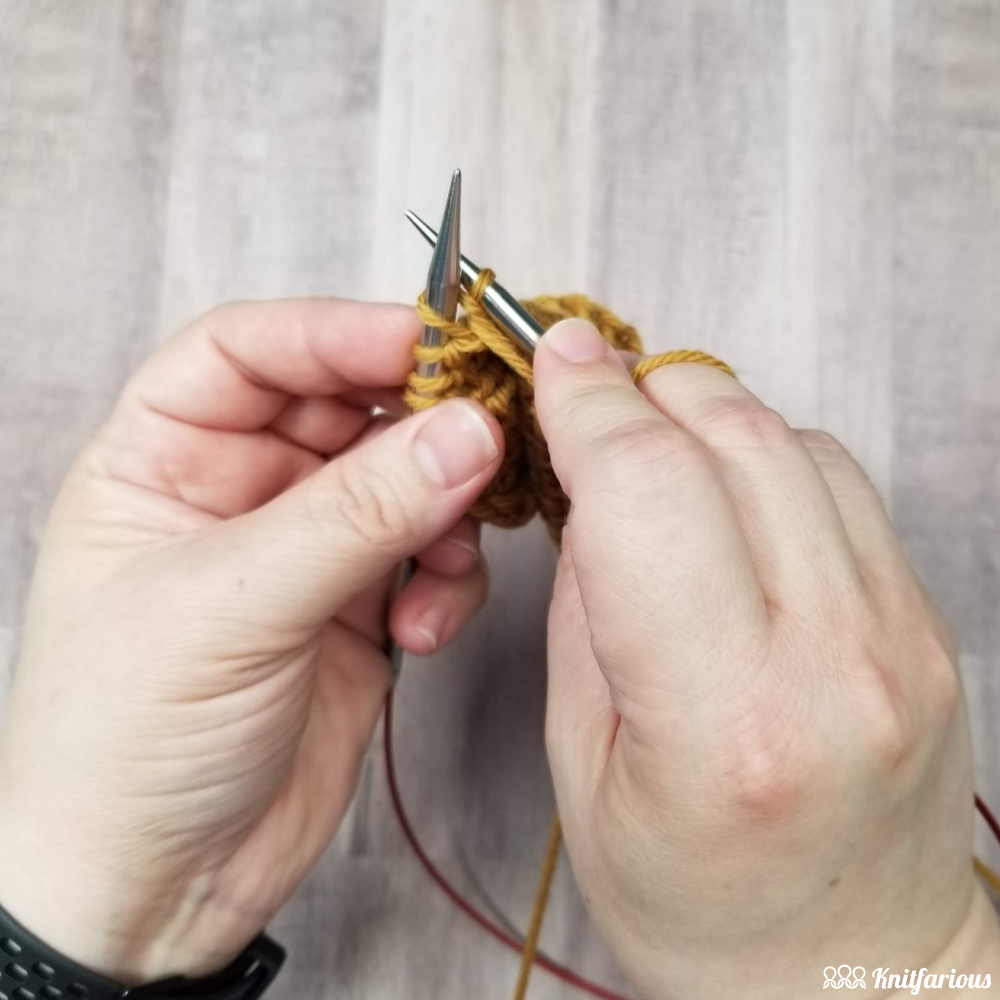
That’s how easy it is to purl through the back loop (ptbl).
Now let’s answer some frequently asked questions about purling through the back loop.
FAQs About Purling Through the Back Loop
Here are some of the most frequently asked questions about knitting through the back loop. If I missed something you’d like answered, drop me a message below.
How is Purl Through the Back Loop Abbreviated in Knitting Patterns?
You will find the knitting abbreviation for purl through the back loop written a couple different ways. The abbreviation to purl is “P” and through the back loop is “TBL” so this instruction is often written with a space between them, like this: P TBL. However, it is also frequently written or abbreviated without a space, like this: PTBL.
You will also see pattern instructions telling you how many stitches to purl through the back loop. I’ll discuss this in further detail next.
Is P2TOG TBL the same as P2TBL?
No, these knitting instructions do not mean the same thing.
The first abbreviation, P2TOG TBL, is a knitting decrease where two stitches are purled together at the same time decreasing one stitch. The second abbreviation, P2TBL, relates to individually twisting purl stitches one at a time through the back loops. This abbreviation is more concise than writing P1TBL twice, etc.
Why Would You Purl Through the Back Loop?
There’s an assortment of reasons why you’d want to purl through the back loop. Here are just some of them.
You’d PTBL when you:
- have loose stitches you want to tighten up.
- want to add texture to your knitting projects, like in this scarf.
- would like to add density to your knitting without adding bulk to your project.
- need to add extra strength and durability to the knit fabric, like in the heel of a sock.
- want to tighten or need a snug fit in your knitting, like for knitted hat brims.
- want to change the overall appearance of your project, like in stockinette stitch patterns.
Practice Purling Through the Back Loop
Now that you’ve learned how a simple twisted knit stitch like the PTBL can create touchable textures in your knitting, it’s now time to try it for yourself. I’m including two free knitting patterns below. I hope you enjoy exploring this variation of the purl stitch and begin to see new design possibilities in your own knitting.
Sialia Shawl

Here’s a one skein knitting project that uses fingering weight yarn and features both KTBL and PTBL. There are also slipped stitches, knitting decreases like the K2TOG and the SSK, and knitting increases as well.
The beauty of the pattern design is that you can stop after any row, which lets you use your entire yarn hank from your yarn stash. The pattern includes both written instructions and knitting charts.
Get this free pattern and yarn for this project below:
Try Cascade Yarn Heritage Wave yarn or Malabrigo Mechita yarn for this shawl project.
Love knitted shawls? You can find more free shawl patterns here. Also, be sure to check out my Aedeline Shawl (shown below), which also uses both knitting and purling through the back loop. I’ve included links to the pattern down below the picture.

Get the Aedeline Shawl and yarn for this project below:
Try Wayback Yarns Truly Twisted SW yarn for this project or try our yarn kit.
Spring Clean
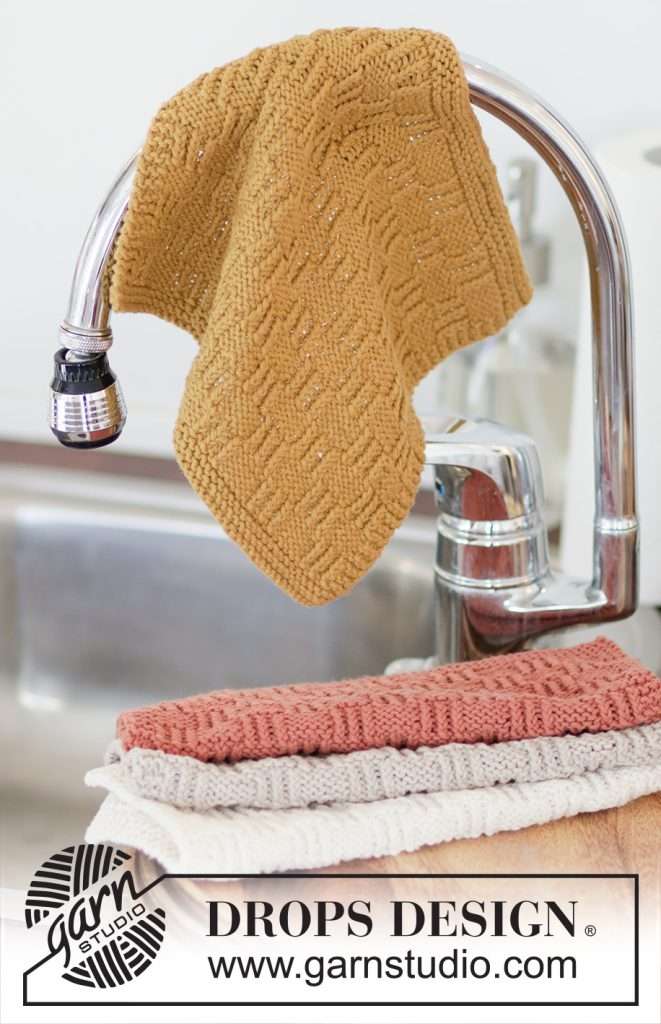
For all you knitters out there who just love knitting washcloths, this free pattern will also give you a chance to practice your twisted stitches.
This pattern does require knowledge of reading knitting charts so, if you don’t know how, now’s a great time to learn! Then, choose your favorite cotton yarn in a solid color and cast on this touchable project.
Love free knitted washcloth patterns? Try my Happy Accident pattern or the Double Broken Rib pattern.
Get this free washcloth pattern and yarn for this project below:
Try Drops Cotton Light yarn or Rico Design Creative Cotton yarn for this knitting project.
I really hope you enjoyed learning about the PTBL stitch technique and feel confident to try this in your next knitting project.
Don’t forget to subscribe to our newsletter to get updates on new patterns, new instructional posts, hand dyed yarn, and so much more.


